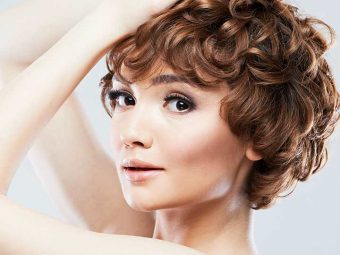
26 Incredibly Stunning DIY Updos For Curly Hair
From classy to edgy, make a great style statement with these gorgeous hairstyles for curly hair.
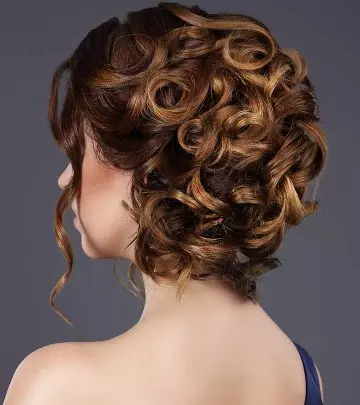
Image: Shutterstock
Curly hair is wildly beautiful!
But when it comes to styling your curly tresses, the more you do to your hair, the more tangles and breakage-prone it gets. The answer is updos for curly hair! Curly-haired updos look ethereal and elegant. They are perfect for weddings and other glamorous events.
So, to help you style your hair in some phenomenal trendy, stylish updos, here are the 26 otherworldly chic, fashionable styles for you to try out! If you have curly tresses from 2C to 4C hair types, you need to check these out. Keep reading!
 Before You Get Started
- Curly hair updos look gorgeous on all face shapes.
- For fuller faces, leave a few strands loose to frame the face for a slimming effect.
- For narrower faces, use intricate hair accessories to pull the hair back and add a bit of bling to the look.
- Make sure the hairstyle is not too tight to avoid breakage and headache.
- Use a good-quality setting spray to keep the style in place.
In This Article
26 Incredibly Stunning DIY Updos For Curly Hair
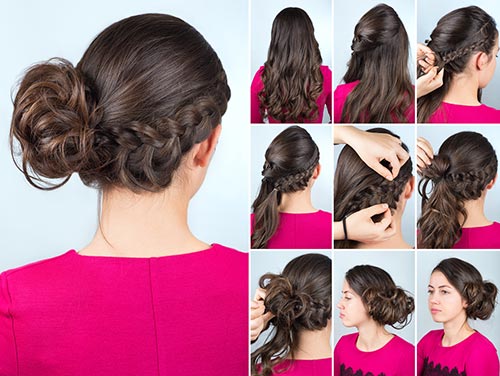
1. Braided Crown Ponytail
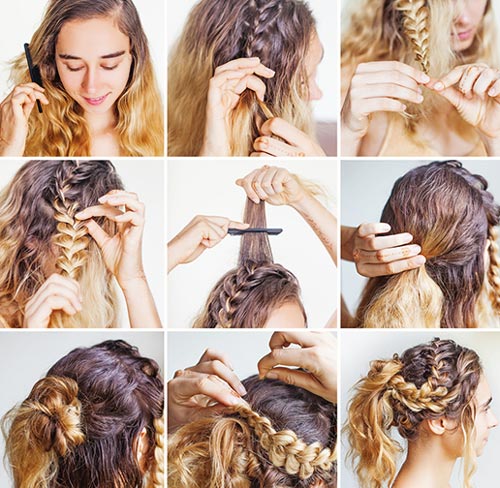
What You Need
- Hairpins
- Elastic bands
- Comb
- Hairspray
Procedure
- Comb your hair and make a side part.
- Separate a section of hair from the deeper side of the side part.
- Leaving a bit of hair in the front, start braiding this section.
- Secure the braid with an elastic band and pull it apart a little to volumize it.
- Take a section of hair from the crown and tease the roots.
- Use your fingers to brush back this section and start twisting it.
- Wrap this twist like a bun and secure it with some hair pins. Keep the end of the hair hanging with the hair at the back.
- Take the braid you did earlier, wrap it around this bun, and secure it with a hairpin.
- Lightly twist the section of hair you left while braiding and pin it with the braid.
- Leave a few tendrils to frame your face.
- Gather the rest of the hair at the back and twist them a little.
- Pin this section of hair above the bun such that the ends of this section fall back freely.
- Finish off with some hairspray.
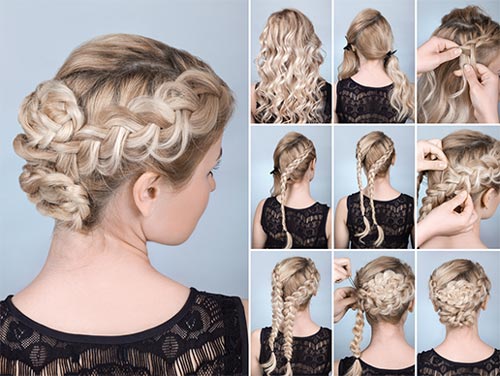
2. Braid Wrapped Bun
What You Need
- Hairpins
- Elastic bands
- Comb
- Hairspray
Procedure
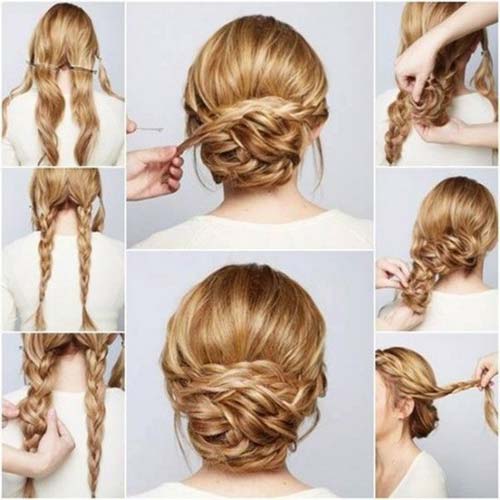
- Use a comb to detangle your hair and make a side part.
- Separate your hair into 2 sections by making a diagonal part from the crown.
- Braid the upper section into a 3-strand braid.
- Take the lower section and make a French braid with it.
- Make sure both braids are on one side and run parallel to each other.
- Secure both the braids with elastic bands and pancake them for a volumizing effect.
- Take the lower braid and pin it near the opposite ear. Use the end that is hanging to make a circular pattern on the crown.
- Similarly, pin the other braid near the opposite ear, and use the remaining braid to make a circular pattern at the nape of the neck.
- Secure everything with some hair pins and finish off the look with some hairspray.
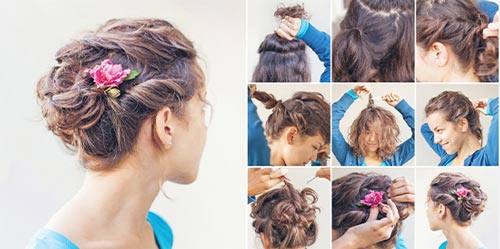
3. Twisted Voluminous Updo
What You Need
- Bobby pins
- Floral hair pin
- Comb
- Hairspray
Procedure
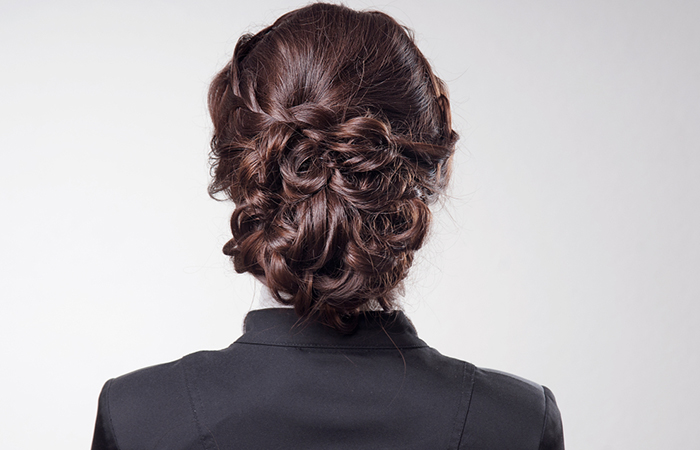
- Wash your hair a day before you try this updo.
- Detangle your hair, divide it into four sections, and clip them.
- Take the section at the back and make a ponytail a little above the nape of your neck.
- Now, twist the two sections on each side and tie them with the ponytail.
- Twist these three sections together and roll them into a bun. Secure the bun with some bobby pins.
- Tease the roots of the hair at the crown for a volumizing effect. Pin the remaining hair section at the back.
- Take small hair sections from this pinned section and twist them. Keep adding them to the bun you made earlier until no hair is left.
- Accessorize the updo with a floral hairpin.
- Pull a few hair strands from the front to frame your face.
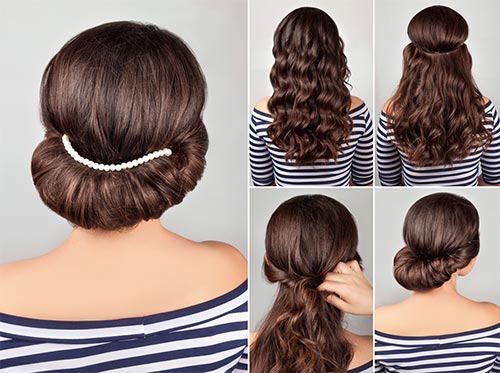
4. Grecian Updo
What You Need
- Hairpins
- Elastic headband
- Pearl hair accessory
- Comb
- Hairspray
Procedure
- Brush your hair and make a middle part.
- Take an elastic headband and place it over your head. Do not tuck it under your hair. The back of the headband should be on the hair on the nape of your neck.
- Gather a small section of hair from one side of the part, just above your ear, and tuck it under the headband.
- Keep gathering small hair sections and wrapping them under the headband till you reach the back of your head.
- Repeat the same process on the other side of your head.
- Take the hair tail left at the back and tuck it in with the rest of the hair. Secure it with some hair pins.
- Accessorize the updo with a beaded hair accessory.
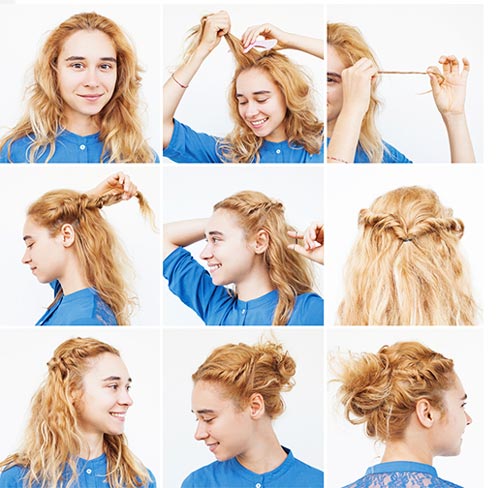
5. Modern Messy Updo
What You Need
- Hairpins
- Elastic bands
- Comb
- Hairspray
Procedure
- Comb your hair to get rid of any tangles and brush them back.
- Take a small section of hair from the middle and start twisting it by adding small hair sections along the way.
- Stop adding more hair sections once you reach the top of your ear and twist the ends.
- Make similar twists on both sides and secure them at the back with a hair elastic.
- Pancake these twists for a volumizing effect.
- Now, gather the rest of the hair and make a messy bun at the nape of your neck.
- Secure with some hair pins and finish with hairspray.
6. The Two Braid Bun Updo
What You Need
- Hair pins
- Elastic bands
- Comb
- Hairspray
Procedure
- Pick up hair from both sides as if you were tying a half ponytail.
- Braid it till the end and then clip it in front.
- Braid the rest of your hair at the back.
- Make sure both the braids are loose enough to move around.
- Take both the braids and wrap them around in a bun at the back of your head, pinning them in place. You can position your bun to the side or in the center.
- Spritz on some hairspray to finish off the look.
7. The Cinnamon Roll Bun
What You Need
- Hair pins
- Elastic bands
- Comb
- Hairspray
Procedure
- Take a section of hair at the middle of your head and clip it up.
- Weave your hair into a Dutch braid. Begin on one side, just near or above your ear, and braid it all around your head until it reaches back to that ear. Simply braid the excess hair. If all your hair is in that braid, pin it in place.
- Take the clipped middle section and weave it into a braid as well.
- Wrap the excess braid around the center and then wrap the middle section braid in the center. It will look like a wheel of braids.
- Spritz on hairspray to set the updo in place.
- You can accessorize this updo with small beads or artificial flowers.
8. Messy Romantic Curly Hair Updo
What You Need
- Hair pins
- Elastic bands
- Comb
- Hairspray
Procedure
- Take the front section of your hair and hold it as if you were tying a half ponytail at the back.
- Pin it in place with two bobby pins.
- Divide the rest of your hair into two sections.
- Take one section and tuck the ends within the half ponytail. Use pins to tuck it in place.
- Repeat the same with the other section until it forms a bun.
- Apply some hairspray to prevent the updo from unraveling.
9. Braided Messy Updo
What You Need
- Wide-toothed comb
- Hair pins
- Elastic bands
- Hairspray
Procedure
- Brush your hair with a wide-toothed comb to remove any knots and tangles.
- Create a diagonal parting on the top part of your head and clip up that large section of hair.
- Begin braiding the other section. As you braid, keep adding hair so that the braid is in line with the curve of your head.
- Once you’ve reached the center of your head, tie up the braid with an elastic band.
- Pancake the braid. This will make it appear wider.
- While tying your hair in a low side ponytail, don’t pull your hair through completely at the last twist of the elastic band. It will look like a loose bun above your ponytail.
- Turn the ponytail around so that the loose hair ends up falling over the bun.
- Using pins, secure the bun and loose hair in place.
- Spritz on some hairspray.
 Quick Tip
10. Lovely Messy Curly Hair Updo
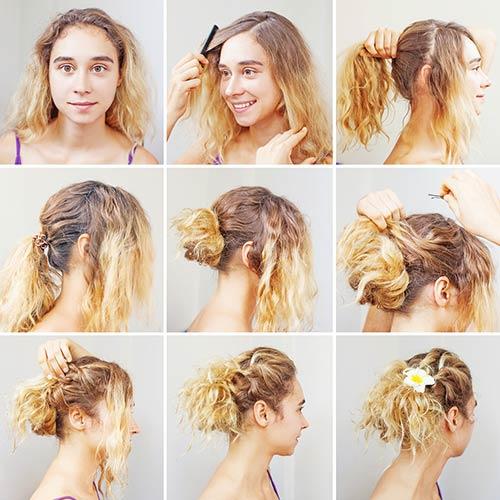
What You Need
- Hair pins
- Elastic bands
- Comb
- Hairspray
Procedure
- Part your hair on one side.
- Leaving a bit of hair in the front, tie your hair into a mid-level ponytail.
- Wrap the ponytail into a bun and secure it in place with some hair pins.
- Divide one of the side sections of hair into three and loosely pin one section up, making the ends fall over the bun. Run the second section through the pinned up part to create a loose twist. Repeat the same with the third section. Pin it in place and, again, let the ends fall over the bun.
- Repeat the same on the other side as well.
- Finish off with some hairspray.
11. Faux Chignon Updo
What You Need
- Hair pins
- Elastic bands
- Sectioning clips
- Comb
- Fancy hair accessory
- Hairspray
Procedure
- Begin by adding definition to your curls. Apply curl defining cream to your damp hair.
- Blow dry your hair using a diffuser.
- If you want to add even more definition, you can curl your hair.
- Allow your hair to breathe for a minute.
- Take a section of hair from the front-center portion of your head and section it away.
- Roll the rest of your hair into a messy bun.
- Pin the bun in place with the curly ends loosely covering it.
- Unpin the front section of hair and create a pouf with it. Twist the ends of the pouf before you pin it up.
- Finish off the look with a sparkly hair accessory and some hairspray.
12. Classy Top Updo
What You Need
- Hair pins
- Elastic bands
- Comb
- Hairspray
Procedure
- Part your hair on one side. Leave out the front section of your hair and tie the rest of it into a ponytail.
- Twist the ponytail into a bun, allowing it to be messy rather than neat.
- Pin the front hair to the side, creating a faux side-swept bangs effect.
- Apply some hairspray.
13. Three Threaded Updo
What You Need
- Hair pins
- Elastic bands
- Comb
- Quadruple-strung thread
- Hairspray
Procedure
- Tie all your hair into a high ponytail.
- Using quadruple-strung thread, tie the ponytail into a bun.
- Take another piece of quadruple-strung thread and tie it around your head as you would a headband. Tie it about an inch in front of the bun.
- Tie two more pieces of the quadruple-strung thread in the same manner, keeping them a centimeter apart.
- Tie the threads tight, so they stay in place and make the bun stand out.
- Finish off with some hairspray.
14. The Fairytale Updo
What You Need
- Hair pins
- Elastic bands
- Comb
- Claw hair clips
- Hair comb accessory
- Hairspray
Procedure
- This hairstyle requires textured hair. So, don’t wash your hair the day you’re trying this updo.
- Clip your hair into four sections. In the front of your hair, create a side parting and then clip off each side. Take the top section of your hair and clip it up. Finally, clip up the rest of your hair.
- Take the section at the back of your head, twist it into a pouf and pin it up.
- Roll the rest of your hair at the back into a messy bun and pin it up.
- Remove the clip of one side section and French braid it loosely. Pin it up near the bun.
- Repeat the same for the other side section of hair.
- Accessorize the updo with a fancy hair comb.
- Spritz on some hairspray.
15. Rolled And Twisted Updo
What You Need
- Hair pins
- Sectioning clips
- Elastic bands
- Comb
- Hairspray
Procedure
- Divide your hair into four sections, keeping the two front sections smaller than the ones at the back.
- Braid both the sections of hair at the back.
- Pancake the braids to make them look wider.
- Wrap one braid around itself. It will end up looking like a flower when it reaches your head.
- Do the same with the second braid. Pin both the braided buns in place.
- Loosely braid the two front sections of hair.
- Wrap one braid under the bun and the other over it.
- Pin them in place.
- Finish off with some hairspray to set the updo in place.
16. The Folded Ponytail Updo
What You Need
- Hair pins
- Elastic bands
- Comb
- Hairspray
Procedure
- Divide your hair into three sections – two in the front and one at the back.
- Tie the back section into a ponytail.
- Take the ponytail and pass it through the hair just above where the ponytail is tied. Pin it in place.
- Repeat the previous step again and again until the ends are safely tucked in. The ponytail has now become a bun.
- Take the side sections and pin them around the bun loosely, leaving out some strands to frame your face.
- Spritz on some hairspray.
17. Curly Ends Updo
What You Need
- Hair pins
- Elastic bands
- Comb
- Hairspray
Procedure
- Divide your hair in two – a top half and a bottom half.
- Take the lower half and roll it upwards. If you have long hair, fold your hair in half and then start rolling it towards the top. Pin it in place.
- Divide the top half into three sections – a big center section and two side sections.
- Twist each side section of the hair and pin it tightly under the bun. You can pin it up underneath the hair falling over the bun.
- Take the remaining center section of hair, roll it loosely in waves and pin it up so that the curly ends of your hair are seen. Pin it up over the bun.
- Finish off with a few spritzes of hairspray.
18. The Curly Top Knot
What You Need
- Hair pins
- Elastic bands
- Comb
Procedure
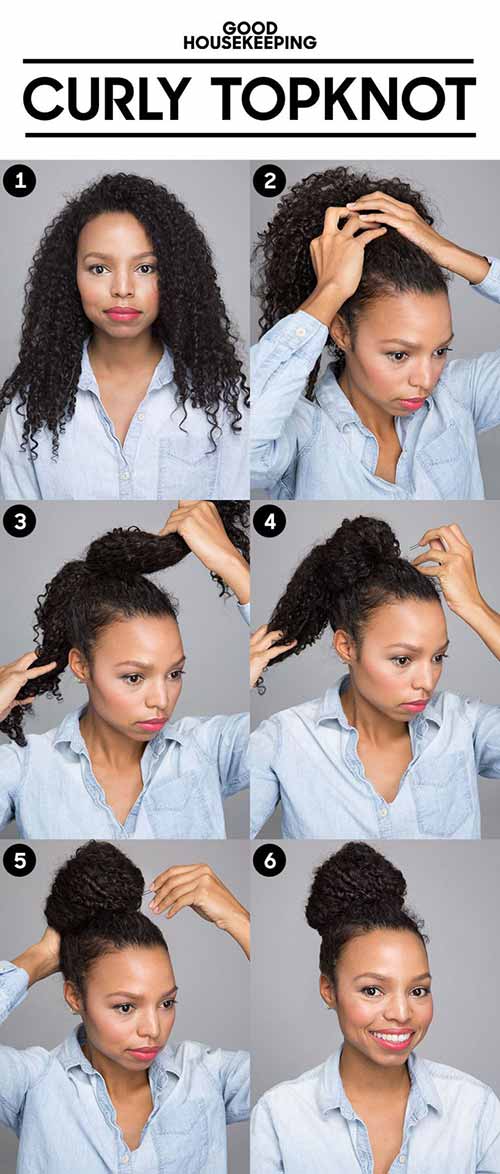
- Take all your hair and tie it in a high ponytail.
- Divide the ponytail into two halves.
- Wrap the top half around itself to form a bun and pin it in place.
- Wrap the bottom half around the top bun. This will give you a big and neat bun.
- Use pins to keep it in place.
19. The Scarf Bun
What You Need
- Hairpins
- Elastic bands
- Comb
- Scarf
Procedure
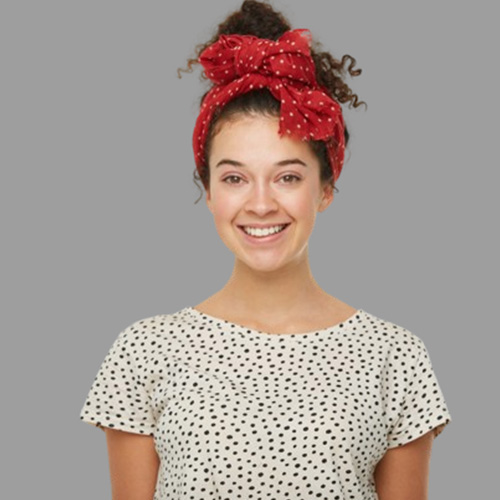
- Tie your hair in a high ponytail.
- Tie a scarf around the ponytail. This will leave you with two scarf ends.
- Divide your hair into two sections. Each section will have one end of the scarf.
- Twist both sections of hair and wrap them around each other, forming a bun. Pin the bun in place.
20. Double Sided French Twist
What You Need
- Hair pins
- Sectioning clip
- Comb
- Hairspray
Procedure
- Apply hairspray all over your hair.
- Divide your hair into two sections – a top section and a bottom section. Clip the top section away.
- Tease the bottom section of hair.
- Comb the lower half all to one side and pin it up.
- Roll the bottom section towards the opposite side to create a French twist.
- Pin it in place with hair pins.
- Unclip the top section of hair and comb it to the other side. Pin it in place.
- Roll the top section inwards in the opposite direction to create another French twist. Once you reach close to the other twisted bun, roll it over it in such a way that they look like one long bun. Secure it in place with hair pins.
- Apply hairspray again to keep it in place for a long time.
 Quick Tip
21. Messy Four Braid Updo

What You Need
- Hairpins
- Elastic bands
- Comb
- Hairspray
Procedure
- Comb your hair to detangle it.
- Take a small section of hair in front and braid it.
- Repeat the same on the other side.
- Divide your hair at the back into two halves and braid them.
- Pancake each braid. Allow the loose strands to fall out as it will create a messy braid look.
- Place the braids along the curve at the back of your head and pin them in place.
- You can pull at the ends to enhance the look.
22. Turned-in And Pinned Updo
What You Need
- Hair pins
- Elastic band
- Comb
- Hairspray
Procedure
- Tie an elastic band about an inch above the ends of your hair.
- Starting from the bottom, roll your hair upwards to create a bun. Pin it in place.
- Pin up the sides to give it more of a bun look.
- Apply hairspray.
23. Curly Twist And Pin Updo
What You Need
- Hair pins
- Comb
- Hairspray
Procedure
- Take some hair on one side and twist it loosely until it reaches the center of your head. Wrap the hair tightly around itself, creating a small bun.
- Pin the bun in place.
- Keep repeating these steps until all your hair is in small twisted buns.
- Finish off with some hairspray.
24. Easy Curly Twisted Updo
What You Need
- Hair pins
- Elastic bands
- Comb
- Hairspray
Procedure
- Divide your hair into three sections – front, center, and back – and tie them up, so they look like a three-part mohawk.
- Take the first ponytail, flip it upwards, and pass it through just above the hair tie.
- Do the same with the next ponytail.
- Take the flipped hair from the first ponytail and pass through the second ponytail.
- Merge the flipped hair from the first ponytail and the second ponytail and pass in through the last ponytail. Merge it with the hair in the last ponytail.
- Flip the hair over and pass it through the third ponytail again, pinning it this time.
- If you have long hair, twirl it into a bun at the end and pin it up.
- Spritz on some hairspray.
25. The Simple Flower Updo
What You Need
- Hair pins
- Elastic bands
- Comb
- Hairspray
Procedure
- Roughly divide your hair into two halves from the center to the end with your hand. Leave the front portion of your hair to fall loose.
- Twirl the back section into a messy bun and pin it tightly in place.
- Divide the front section into two halves with a side parting. Take the section with lesser hair, twist the end, and pin it under the bun.
- Take the second section of hair and twist it. Pin it above the bun.
- You can also make a few more twists instead of only two. If you have thin hair, to make the hair look big, divide your front hair into four sections and then pin them up.
26. Curly Half Updo
What You Need
- Hairpins
- Comb
- Hairspray
- Curling iron
Procedure
- Begin by dividing your hair into small sections for easy styling.
- Spray your hair with heat protectant
- Section your hair and use a curling iron to create curls. Hold the iron in place for a few seconds to achieve well-defined curls.
- Take a section of hair from the crown of your head, adjusting the amount based on your hair thickness and desired volume.
- Use a comb to gently tease the roots of this section to add volume.
- Once you are satisfied with the hair volume, twist the teased section and gently pull it backward, creating a small bouffant.
- Secure this section with bobby pins to hold it in place and maintain the style.
One common complaint my curly haired friends have is that it doesn’t stay in place for very long. So, here are a few simple tips that will help keep your updo perfectly in place for a few good hours.
How To Maintain An Updo
- Make sure you pin your hair tightly. Make sure your pins are in a color that is close to your natural hair color. For some updos, you’ll need a lot of pins, and it helps if they’re all the same color as your hair.
- Hairspray. This is a law to live by! Hairspray will keep your updo in place for hours. You can carry a travel-sized hairspray can in your clutch or handbag.
- The key to holding pins and clips in place is to criss-cross them. This keeps them tightly intact.
- Spray some hairspray onto elastic bands, hair clips, and hair pins before putting them in your hair. This will help give them more grip on your hair and, thus, stay in place.
- Spritz some hairspray on a hair brush and then brush your hair. This removes frizz and keeps stray hair strands in place.
- You can try stitching your hair instead of using an elastic band or hair pins. But be very careful, you don’t want to hurt yourself. You can use a clear fishing thread and a needle.
- Don’t wash your hair before trying an intricate updo. Most hairstylists will ask you to wash your hair a good 24 hours before styling it. This gives your hair texture, which will help keep your updo in place and intact.
- It is always better to use a curl defining and enhancing cream on your curls before you start your updo. Apply the cream when your hair is damp (not wet!), then use your blow dryer with a diffuser to dry your hair. Allow your hair to cool down and then begin your updo.
Infographic: 6 Glam Curly Hair Updos
Curly hair might be difficult to manage but the best thing about this hair type is that it looks gorgeous even in the simplest hairstyles. All the updos above can be customized for various occasions with just a little bit of tweaking. However, some of them are styles that will make head turns at your social events. The below infographic presents a round-up of the most glam curly updos for your next party. Check it out!
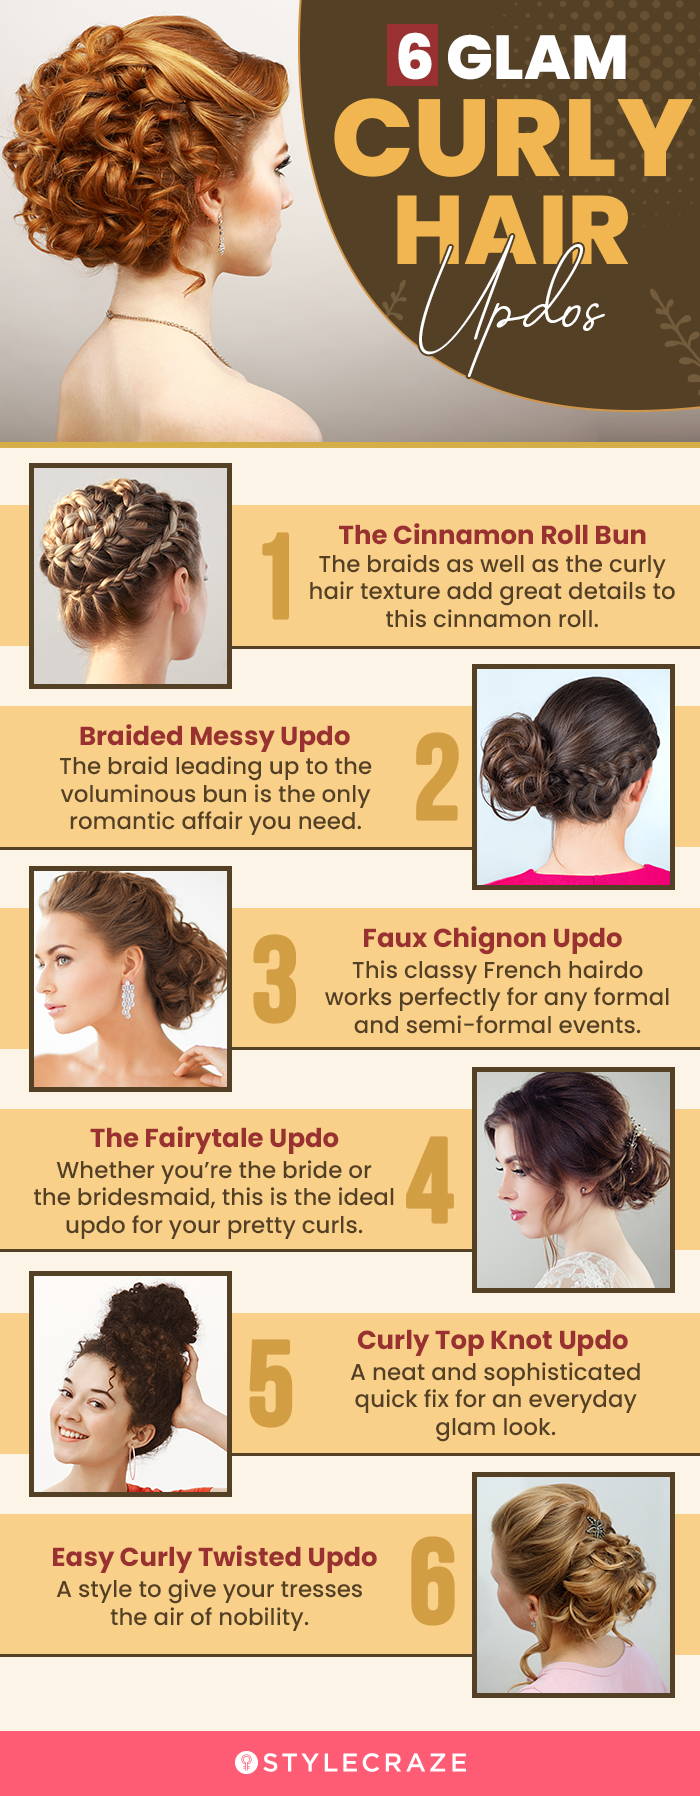
Illustration: StyleCraze Design Team
Curly tresses are a beautiful hair type that should be flaunted to perfection. It is no surprise that so many elegant updo hairstyles are based around curls. Curls not only add beauty to your hair, making it look thicker, healthier, and luscious. But they can also help frame your face and accentuate certain facial features. Curls create texture within your style. If you do not have naturally curly hair, do not worry. You can always use heat or non-heat methods to curl your straight or wavy tresses. Do you have an event that you need to attend, but are worried that your curls might get frizzy or unmanageable and ruin your look, try out these updos for curly hair.
Frequently Asked Questions
How can you maintain volume and definition while doing an updo with curly hair?
You will need volumizing sprays and bobby pins to maintain the volume and definition while doing an updo with curly hair.
What are the best products to use for an updo on curly hair?
The best products to use for an updo on curly hair are anti-frizz products and conditioners for a salon-like finish.
Key Takeaways
- Curly hair can flatter all face shapes. You can put it up in fanciful updos or let it loose.
- Loose buns and braids pair well with curly hair to create a messy look.
- Opting for braided updos ensures extra protection for curly hair as well as helps enhance your look.
- A top bun is the ideal summer hairstyle for curly hair if you want a casual yet put-together look.
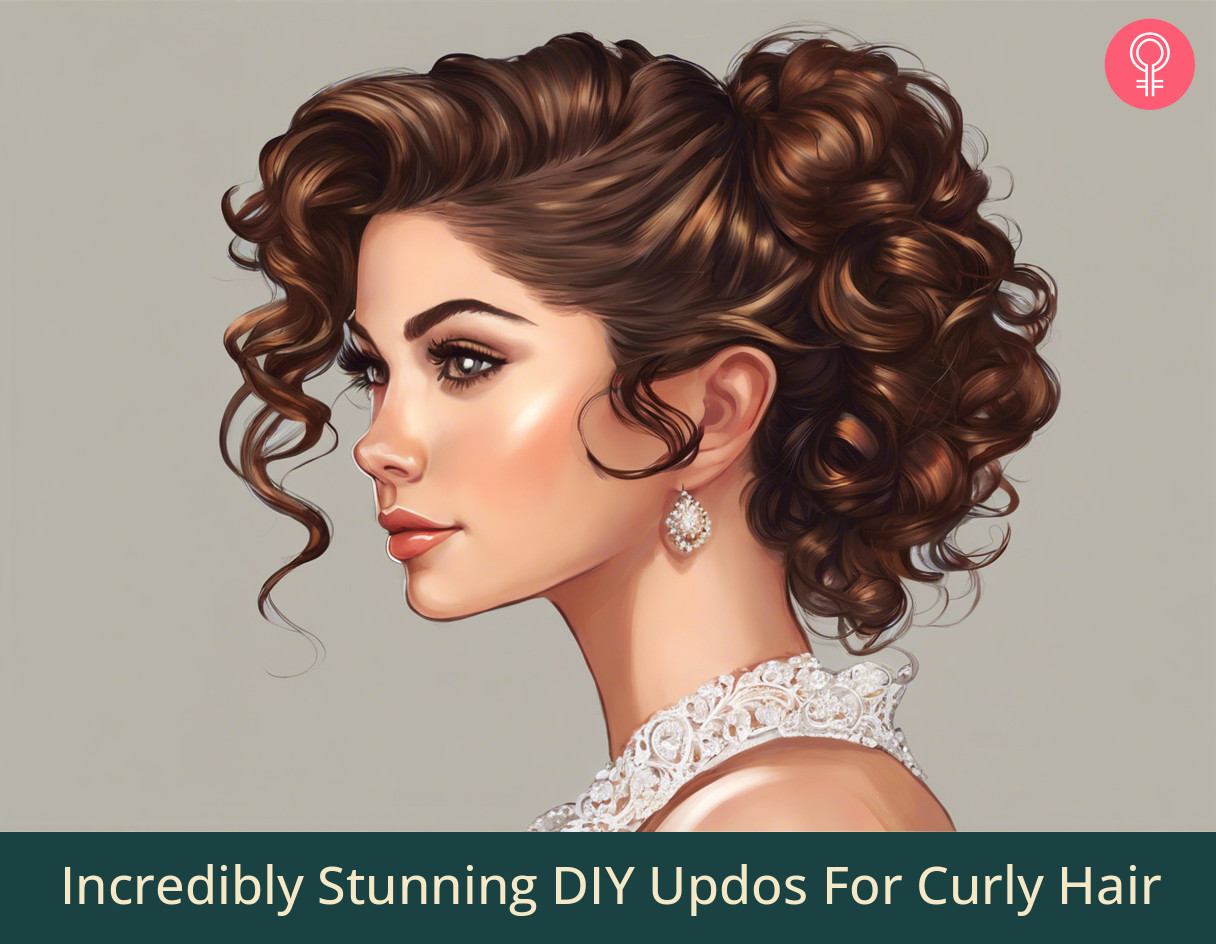
Image: Stable Diffusion/StyleCraze Design Team
Learn how to create a super easy curly updo in minutes! Perfect for any occasion, this style is sure to turn heads. Check out this video to see how to make it work!


